Archive for the ‘Programing’ Category

Using Java CUP

Tuesday, March 16th, 2010

The following is a tutorial on using java CUP with JFlex for the project 2 assignment in CS4413/CS5413 at Lakehead University


Install and Setup

It is assumed that you have java and jflex (see http://hackerdan.com/programing/using-jflex/) installed and working.


Download CUP from http://www2.cs.tum.edu/projects/cup/ (direct link: http://www2.cs.tum.edu/projects/cup/java-cup-11a.jar)


Move java-cup-11a.jar onto your class path or add the directory java-cup-11a.jar is in to your class path.

For example, if java-cup-11a.jar is in /home/dan/comp_class/java-cup-11a, add /home/dan/comp_class/java-cup-11a to your class path. See http://hackerdan.com/programing/using-jflex/ for details on changing environment variables.


Create a directory named parser (this is where your code will go), and copy all the files included with the project from WebCT. The following files should be included:

lexer.flex
Driver.java
LEXSymbol.java
parser.cup
SrcLoc.java
test2.cmm
test1.cmm

Note that lexer.flex is different from project 1 and contains a complete lexer for use with this project. Also note that the Token class has been replaced by LEXSymbol.java which functions differently. You can use your solution from project 1 in place of lexer.flex but it will likely need some heavy modifications.


If you have JFlex installed from project 1 and a working java compiler everything should be ready to go.


Using Java CUP

First run JFlex on the lexer.java file to generate Lexer.java (see http://hackerdan.com/programing/using-jflex/ for details).


Add your changes to parser.cup (fill out the nonterminals, precedences and grammar sections, see the next section for tips) and run:

java -jar /home/dan/comp_class/java-cup-11a.jar parser.cup


This should generate parser.java and sym.java and have output similar to:

------- CUP v0.11a beta 20060608 Parser Generation Summary -------
0 errors and 0 warnings
42 terminals, 18 non-terminals, and 90 productions declared,
producing 192 unique parse states.
0 terminals declared but not used.
0 non-terminals declared but not used.
0 productions never reduced.
0 conflicts detected (0 expected).
Code written to "parser.java", and "sym.java".
---------------------------------------------------- (v0.11a beta 20060608)


If you get Errors that look like the following:

Error: Syntax error @ Symbol: LBRACK (unknown:82/19 - unknown:82/20)
Error : Illegal use of reserved word
......

It means there is a syntax error on the given line (in this case 82).


If you get a warning such as:

Warning : Scanner at 122(10): Unrecognized character '{' -- ignored

It means there is an illegal character in your .cup file (many of the common regex and EBNF characters are not supported in Java CUP).


If you get a warning such as:

Warning : Terminal "UMINUS" was declared but never used

It means one of your terminals or none terminal which was declared in your .cup was never used in your grammar. In some cases this is ok.


If you get a warning such as:

Warning : *** Reduce/Reduce conflict found in state #12
between lvalue ::= ID (*)
and type ::= ID (*)
under symbols: {ID}
Resolved in favor of the first production.

It means a conflict was found in your grammar where two rules have identical right parts and the parser is basically guessing which one to use. For example:

nterm1 ::= ID;
nterm2 ::= ID;

Will cause this error as the rules are the same.


If you get a warning such as:

Warning : *** Shift/Reduce conflict found in state #12
between lvalue ::= ID (*)
under symbol ID
Resolved in favor of shifting.

It means there is a conflict in your grammar where after shifting two rules are identical, for example:

nterm1 ::= TERM '+' nterm3;
nterm2 ::= TERM '+' ID;
nterm3 ::= ID;

In this case nterm1 and nterm2 are identical after ID is substituted in for nterm3.


Although grammar conflicts are warnings, they should not be ignored as they indicate there is likely a problem with your grammar despite the syntax being valid.


Warnings such as:

Warning : *** Production "formal ::= type ID " never reduced

mean that rule can never be reached from the given “start with” rule. This is a problem if you expect that rule to be part of your parser.


Keep fixing any warnings and errors until generation succeeds with no errors. Next we need to compile the generated code:


Compile LEXSymbol.java (from WebCT):

javac -classpath .:/home/dan/comp_class/java-cup-11a/java-cup-11a.jar parser/LEXSymbol.java


Replace
/home/dan/comp_class/java-cup-11a/java-cup-11a.jar with the full path to java-cup-11a.jar on your system in the above and following examples (or set up your classpath so the -classpath argument is not needed).


Compile sym.java (generated by Java CUP):

javac -classpath .:/home/dan/comp_class/java-cup-11a/java-cup-11a.jar parser/sym.java


Compile parser.java (generated by Java CUP):

javac -classpath .:/home/dan/comp_class/java-cup-11a/java-cup-11a.jar parser/parser.java


Compile Lexer.java (generated by JFlex):

javac -classpath .:/home/dan/comp_class/java-cup-11a/java-cup-11a.jar parser/Lexer.java


Compile Driver.java (from WebCT):

javac -classpath .:/home/dan/comp_class/java-cup-11a/java-cup-11a.jar parser/Driver.java


If there were any errors or warnings while compiling, there is a issue with one of your specification files (.cup or .flex), something wrong with your environment variables (class path issue), or an issue relating to how your java package is set up.


Once everything is compiled you may run your parser like so:

java -classpath .:/home/dan/comp_class/java-cup-11a/java-cup-11a.jar parser.Driver parser/test.cmm

where the second argument is the path to your .cmm code file.


If there was an issue with your grammar or the code in the .cmm file is not valid, you will get error such as:

Syntax error parser/test.cmm:22:2 Got: 'else'

if the .cmm is valid you should go back to your .cup file and try to fix any issues and regenerate and recompile everything.


A successful run (assuming the code file is valid) will look like:

parsing [parser/test.cmm]
Lexeme for comment [/* Foo Class */]
Lexeme for comment [/* Main Class */]
Parsing Completed. Top symbol = #0


At this point you should have a parser capable of validating  a C– file, which is all that is required for the project. However if you would like to use Java CUP to make a C– interpreter capable of running simple C– code there are a few more steps needed which you can read about in the PDFs on the following link: http://www.cs.auckland.ac.nz/~bruce-h/lectures/330ChaptersPDF/ (particularly chapter 9).


Parser Specification

Java CUP’s specification file has five main sections:


Preliminaries
Any settings or emended code that will affect how the parser.java file is generated. In our case this section is provided for us and should not need any changes.

Code between “parser code {:” and “:}” is placed in the parser class in the generated parser.java file.


Terminals
This section lists all terminals that may be used in the parsers’ grammar. These terminals are the tokens from our JFlex scanner and in this case are provided for us.

The format of the terminal line is as follows:

terminal [TYPE] TERM [, TERM]*;

Where the optional TYPE parameter specifies what type the terminal objects listed are of and the TERM parameters list the terminals that may be used in the grammar section.


Non Terminals
Non terminals are the rules of the grammar and follow the same format as in the terminal section. Each terminal must be defined before it may be used and as with the terminals the type parameter is optional.

Example:

nonterminal classList, classDed, deck, formals, statement, assignment;

Note that both terminal and non terminal names cannot be CUP reserved words (”code”, “action”, “parser”, “terminal”, “non”, “nonterminal”, etc).


Precedences

Often grammar is ambiguous and this section lets us state the precedences and associatively of terminals outside of our grammar (allowing us to keep the grammar simple, and still resolve ambiguity). This section is optional if your grammar has no ambiguity.

The format is as follows:

precedence (left | right | nonassoc) terminal [, terminal]*;

These lines set the order of precedence, from highest to lowest, from bottom to top. For example:


precedence left ADD, SUBTRACT;
precedence left TIMES, DIVIDE;

Resolves the ambiguity in grammar such as:
A ::= A ADD A | A SUBTRACT A | A DIVIDE A | A TIMES A | a

with ADD and SUBTRACT having a lower precedence than TIMES and DIVIDE (multiplication and division will be performed before the addition and subtraction).

Any terminal not listed will be given the lowest precedence. See http://www2.cs.tum.edu/projects/cup/manual.html for more information.


Grammar

Finally the grammar section allows the specification of the parsers’ grammar in a BNF like format. Note that this format is not the same as the EBNF format that the grammar for C– is given in, and some rules and changes will need to be added and made.

The starting rule is specified with the “start with” tag as shown below:

start with classList;

An example of a simple grammar is shown below:

start with A;

A ::= A ADD A
| A SUBTRACT A
| A DIVIDE A
| A TIMES A
| a;

This is a simplistic explanation of the grammars in CUP, for more info see: http://www2.cs.tum.edu/projects/cup/manual.html.


Project Hints

  • Don’t modify the code in Driver.java,  SrcLoc.java, or LEXSymbol.java. There should be no need for this project, however, looking over how they work will help in creating your parser and understanding how it works.
  • Don’t modify the code in parser.java or Lexer.java manually, they should be generated via Java CUP and JFlex respectively. You can embed code in the specification file that will be placed in the generated .java file, however, there should be no need for this project.
  • Make sure you have your class path settings right or give the full path to the Java CUP jar like in the examples given.
  • Make sure you have the java package set up correctly. All class and java files should be in the parser package and in a directory with the same name.
  • Don’t ignore warnings from Java CUP, they almost always indicate that something is wrong and needs fixing.
  • If you use the given .jflex file the only file you need to submit is the .cup file, however, you may also include example outputs, test cases and screenshots.
  • If you don’t use the given .jflex make sure to include yours and any .java files it uses. Also ensure that you note any changes you made. Your lexer from project 1 may need some changes to work with Java CUP, use the given .jflex files as an example.
  • The grammar given in the project for C– will need changes to work with Java CUP, but should be equivalent.
  • If you make any improvements to the given grammar, make sure to note them and why they were added so they are not marked as incorrect.
  • Make sure to put your name and student number on everything (you would be surprised how many students forget this).
  • Use Java CUP 11a beta 20060608 executable standalone Jar-package (this is what I will use to mark your project)


Resources

Java CUP

  • Java CUP: http://www2.cs.tum.edu/projects/cup
  • Java CUP Manual: http://www2.cs.tum.edu/projects/cup/manual.html
  • Java CUP Download: http://www2.cs.tum.edu/projects/cup/java-cup-11a.jar


JFlex

  • JFlex: http://jflex.de/
  • JFlex Download: http://jflex.de/jflex-1.4.3.zip
  • JFlex Manual: http://jflex.de/manual.html


Lectures/Tutorials

  • Bruce Hutton’s Lecture Notes: http://www.cs.auckland.ac.nz/~bruce-h/lectures/330ChaptersPDF/


Examples

  • CUP grammar for the Java programming language: http://www2.cs.tum.edu/projects/cup/javagrm.tar.gz
  • CUP/JFLex interoperability: http://www2.cs.tum.edu/projects/cup/minimal.tar.gz
  • CUP/JFLex sample project: http://www2.cs.tum.edu/projects/cup/demo.zip

Using JFlex

Friday, January 15th, 2010

The following is a tutorial on using JFlex for the project 1 assignment in CS4413/CS5413 at Lakehead University


Step 1: Download and Setup JFlex


The first step is to download and setup jflex (assuming you have java installed and setup correctly).

The link to download it is: http://jflex.de/jflex-1.4.3.zip
Once you have the zip file downloaded unzip it into a folder where you would like to install it. This can be any folder as long as your user account has permission to run the programs in it. In my case (using linux) I have installed it to /home/dan/compilers/jflex-1.4.3.


Next you need to add the bin directory in jflex-1.4.3 to the system’s path. How to do this is different on each OS.


For windows XP:
1. Start -> Control Panel -> System -> Advanced
2. Click on Environment Variables, under System Variables, find PATH, and click on it.
3. In the Variable Value text box add ;my_path_to_jflex\jflex-1.4.3\bin\ to the end  where “my_path_to_jflex” is your path to the jflex folder you installed. For example if you installed jflex to C:\Users\Dan\jflex-1.4.3 the text that you would add to the path would be ;C:\Users\Dan\jflex-1.4.3\bin\  make sure to not to delete the contents of the text box and only add to them.
4. Click OK -> OK -> OK untill you are back to the desktop.

See http://support.microsoft.com/kb/310519 for more information on system variables in xp.


For windows Vista and 7:
1. Click on the start menu and type “edit the system environment variables” into the search box in till you see the control panel short cut come up.
2. Click “edit the system environment variables” and then click Environment Variables on the window that pops up.
3. From the System variables list find Path and double click on it.
4. In the Variable Value text box add ;my_path_to_jflex\jflex-1.4.3\bin\ to the end where “my_path_to_jflex” is your path to the jflex folder you installed. For example if you installed jflex to C:\Users\Dan\jflex-1.4.3 the text that you would add to the path would be ;C:\Users\Dan\jflex-1.4.3\bin\ make sure to not to delete the contents of the text box and only add to them.
5. Click OK -> OK -> OK untill you are back to the desktop.


For Linux/Unix using the bash shell:
1. Open ~/.bashrc in your favorite editor (ex. nano ~/.bashrc).
2. At the end of the file add:

PATH=$PATH:your_path_to_jflex/jflex-1.4.3/bin
export PATH

Where your_path_to_jflex is your path to the folder where you installed jflex. For example my PATH line is PATH=$PATH:/home/dan/compilers/jflex-1.4.3/bin
3. Save the file.


Once you have updated the path on your system you may need to logout and back in or restart your shell before the changes take effect.


Windows users will also have to edit the jflex.bat file in jflex-1.4.3/bin and set JFLEX_HOME in the file to their correct value.

JFLEX_HOME should point to the directory where jflex is installed. For example if jflex was installed to C:\Users\Dan\jflex-1.4.3\ the line should be: set JFLEX_HOME = C:\Users\Dan\jflex-1.4.3\

Next the lines following the “only needed for JDK 1.1.x” and “for JDK 1.1.x” comments should be removed or commented out. And finally the “rem” on the last line should be removed. The file should look something like this:

@echo off
REM Please adjust the paths JFLEX_HOME and JAVA_HOME to suit your needs
REM (please do not add a trailing backslash)

set JFLEX_HOME=C:UsersDanjflex-1.4.3

REM -------------------------------------------------------------------

set CLPATH=%JAVA_HOME%libclasses.zip;%JFLEX_HOME%libJFlex.jar

REM for JDK 1.2
java -Xmx128m -jar %JFLEX_HOME%libJFlex.jar %1 %2 %3 %4 %5 %6 %7 %8 %9


Linux users may want to take a look at the jflex-1.4.3/bin/jflex script however, it should be fine by default.


Step 2: Using JFlex


Jflex can be used via it’s GUI or via the command line. To use the GUI simply type jflex on the command line/shell and the GUI should run. To pass an input file to jflex via the command line simply type jflex input_file where input_file is the name of the lexical specification file (in our case lexer.flex).


GUI
1. Click the browse button for the Lexical specification field and select your Lexical Specification file (lexer.flex).
2. If you want to output the java class in a different directory then listed in the output directory filed, click the browse button by the output field and select the new output directory.
3. Click generate.
4. Look at the Messages text box. If there are warnings or errors there is likely something wrong with the contents of your lexer.flex file, go through it and fix any errors and try to generate it again. If there are no errors or warnings your lexical analyzer should be created in the output directory as a .java file (in our case Lexer.java).


Command Line
1. Use the command line or shell to navigate to the directory with your lexical specification (lexer.flex).
2. Type in jflex input_file where input_file is the name of your specification (lexer.flex).
3. If there are warnings or errors there is likely something wrong with the contents of your lexer.flex file, go through it and fix any errors and try to generate it again.
4. If there were no errors or warnings your lexical analyzer should now be output in the same folder as a .java file (in our case Lexer.java).

For more details on install and running jflex see http://jflex.de/installing.html


Step 3: Using the Lexical Analyzer


For this assignment a Driver.java and Token.java file were given to you that contain the code to use the lexical analyzer generated as Lexer.java. To use them on the C– code provided you must first compile the java code using javac. Since Driver, Token and Lexer are all in the same package they must be in the same directory named lexer. To compile the code simple issue the following commands in your shell/command line:


javac Token.java
javac Lexer.java
javac Driver.java

If there was an error comping the Lexer.java file, there likely was a problem with your lexical specification.


If all the code complied with no errors or warnings you should be able to run the Driver program on some C– code by issuing the fallowing command:


java Driver cmm_file

Where cmm_file is the text file contain the C– code. For example if the code file is test.cmm the line should be java Driver test.cmm.

Ideally there should be not errors and the output should match the example output given (assuming you used the example input in test.cmm).


Assignment Tips


  • Make sure all your class files are in the same folder named lexer and that this folder is in the java class path.
  • There should be no need to make any changes to any of the .java files. All the work should be done in the lexer.flex file.
  • Take a look at the contents of the Token.java file, the tokens that are returned by nextToken in the scanner should be of this type.
  • Make sure to test your scanner on the given sample input/output.
  • You can find the jflex documentation here: http://jflex.de/manual.html which will help you in creating the lexer.flex specification.
  • http://www.cs.auckland.ac.nz/~bruce-h/lectures/330ChaptersPDF/ is also a good resource for using JFlex and CUP.

I Can Haz Data?

Monday, June 23rd, 2008

Image from anomalous4's photostream on flickrI am currently in the process of getting grade data to be shared between Moodle and Adobe Flex with Flare in a secure and elegent way.

Flare has some nice built in functions for loading data from a url that is either in a tab or json format, witch would normally work great except the data in question consists of students grades and statistics relating to them witch can not be publicly shown and is protected by Moodle’s capability system. This means that Flare can not simply load a page that outputs the data in tab or JSON format as it would not have the session or cookie that the browser does to let Moodle know that you have the capability to access the data so it just gets the HTML for an error page.

Passing a user name and password (or hash there of) between the Flash Player and the web server are out of the question for security reasons and embedding all the data needed to generate the visualizations in the Flash variables or JavaScript becomes ugly fast and could break down in the cases of very large sets of data (there is a limit to the length of a Flash variable passed from HTML). There also is no way i know of to share a browsers cookies with Flash and then the sites it calls on (and if there is it would mean recoding how the Flare DataSource class works).

The solution? Well the method i am country working on is passing the session name and id from Moodle to Adobe Flex/Flash (threw the Flash variables embedded in the HTML generated by PHP) and then using the Flare DataSource class to load the URI of the JSON formated data with the course id, session name, session id and graph/visualization type appended to it. Hopefully this method will work like how cookieless sessions do in Moodle where the session information is appended to the URI and Moodle will see the request as if it came from the user them self, with the correct capabilities.

My only concern with this method is if a teacher or student where to save the HTML of the page and send it to some one it would contain there session information. In theory this information could be used to access the account that is tied to the session and the attacker could then change the password for the account to take it over. However this would only be possible for the period of time when the session is valid and would be just as insure as Cookieless sessions all ready are in Moodle (in terms of a user copy and pasting there URI with the session id in it) and a user would have to willingly give a copy of the HTML to the attacker.

If all goes well i will have a simple demo of this before the end of the week that can show a simple graph of grades using Flare.

Debugging Flex

Monday, June 23rd, 2008

flex-icon.pngAs i have been working with Flex and the Flare library to make a test program to send data from Moodle’s Grade Book to Flash i have ran in to a problem running the Flash debug player.

When i trying to “Debug as Flex Application”, the application would come up in Firefox but in the debug console in Eclipse i would get something along the lines of “Waiting for Flash Player to connect to debugger” and then eventually an error about it failing to connect. If the debugger was working it would provide needed information from the running flash application including text you send back using the trace command.

The problem it seems is that when installing Adobe Flex Builder for Linux, a flash player for Mozilla Firefox is also installed. However the player that was installed was not the debugging version but a normal copy of Flash 9. So it could play compleid Flex applications but not connect to Flex Builder to display needed debugging information. Lucky, although the debugging version for Firefox was not installed a copy of the stand alone debugger was but had not been set up in the path environment variable.

For me the stand alone player was copied to /home/dan/Adobe_Flex_Builder_Linux/Player/linux/flashplayer and all i had to do was add the path /home/dan/Adobe_Flex_Builder_Linux/Player/linux/ to the global path variable and restart the computer (for some reason the path will not update in Eclipse in till you at least log out and back in again). Then to make the “Debug As” command open the application in the stand alone player rather then in Firefox, the path to launch has to be changed from launching the html file to launching the swf file (for me this was a change from /home/dan/workspace/flare_test/bin-debug/flare_test.html to /home/dan/workspace/flare_test/bin-debug/flare_test.swf). This change must be made in Debug Dialog witch you can get to threw the “Debug As” menu. Now when running “Debug As Flex Application” the Flex Application will open in the stand alone player with debugging working and “Run As Flex Application” will open in Firefox using the normal Flash 9 player.

Also it seems that Adobe accepted by application for a educational licenses for Flex Builder, so i no longer have to worry about the time running out or it deactivating witch is nice.

Adobe Flex + Flare

Thursday, June 19th, 2008

box_flexbuilderstandard3_150×150.jpgNow that the report/stats plug-in has a release out i have started geting Adobe Flex and Flare set up for the report/visual plug-in.

The first issue i ran into is that i could not find a copy of Adobe Flex Builder or the Eclipse plug-in for a Unix/Linux based operating system witch i am using for development. There site seems to only list versions for Mac and Window even tho flex is sposted to be cross platform. After some time searching tho i was able to find an alpha version of Adobe Flex Builder for Linux from Adobe Labs.

Another issue that may come up for students is the cost of Adobe Flex Builder, normally it is priced at $249 for the standard version and $699 for the professional version but there is a time base trial version that can be used for 60 days. luckily for students and other persons in education institutions, Adobe offerers a free educational version with proof of enrollment. I have applied for the educational license but i can take up to two weeks for them to e-mail you with the key so in till then i will be using the trial version. There is a stand alone Flex SDK that is free and lets you use any IDE you like witch would also solve both theses issues but is apparently more complexed to use and has less features.

The next step in setting up Flex was the installing process. For Linux the installer comes in the forum of a bin file witch you can execute by typing “sh filename.bin” in the console. If done correctly a GUI based installer will pop up and guide you threw the install process. Unfortunately this step was not totally strait foreword as one of the requirements is Eclipse 3.3 when the package system i am using still lists 3.3 as unstable. So i had to remove the mask on version 3.3 and all a bunch of it’s dependency to updated to the new version.flare-logo.gif

Now to add in flare, i had to download the prefuse flare libraries and unzip them in to my workspace directory and with that Adobe Flex and Flare should be installed on my Linux laptop and ready for development. In my next post i hope to talk about getting started with flare and talk about the start of the report/visual plug-in.

As for report/stats, i have added a printer friendly version and option to invert the statistics table to report/stats witch can be seen on the demo site, this lets users have the table extend downwards rather then width wise so the report will fix on there screens and be easier to print.

CVS, Demo and a Bug

Tuesday, June 17th, 2008

I have committed the code for my first version of the report/stats plug-in to the Moodle cvs (in the contrib module). You can brows the contrib cvs files here or you can download a copy of the nightly build of the stats report at http://download.moodle.org/plugins/grade/report/stats.zip.

There is also a public demo online located at http://compsci.ca/~dan/moodle/. You can login as a guest, go to a course, click grades in the lower left hand menu and then select stats report in the drop down menu at the top left to see the stats report. You may also create an account and sing up as a student to see how tasking some of the tests effects the stats report.

My latest development efforts where slowed down some what due to a new bug creeping in to some of the core Moodle 2.0 code and everything breaking for me once i updated to the latest version threw cvs. Lucky i was able to report the bug and submit a patch to fix it and it was added to the cvs so everything is back to working. You can find out more about the bug at http://tracker.moodle.org/browse/MDL-15253. It was not much of a patch (just changed one line) but it is kind of cool seeing your bug report and patch get in to an open source project.

For up to date information on the project including cvs commit messages you can view the tracker issues and sub issues set up for it at: http://tracker.moodle.org/browse/CONTRIB-477 (report/stats sub task here).

Making SciTE Play Nice With Moodle’s Coding Guide Lines

Saturday, June 14th, 2008

The Moodle community has a long list of specific guide lines for how to write and format your code, most of witch are there for a good reason or to ensure similar coding styles. However one of theses rules specified that all indentations be exactly four spaces and no tab characters be used in the document at all.

Although doing this by hand is possible in a simple editor, the IDE i am using, SciTE, likes to auto indent lines with tabs and even if it did not it would be a pain to count out four spaces each time you need to indent. Lucky there is a way to make SciTE do this for you and ensure all tabs and indentations are four spaces even if you hit the tab key.

All you have to do is add the fallowing to the user options file, /home/yourusername/.SciTEUser.properties :

# Indentation
tabsize=4
indent.size=4
use.tabs=0
indent.auto=1
indent.automatic=1
indent.opening=0
indent.closing=0
tab.indents=1
backspace.unindents=1

This will ensure that your indents are four spaces, will change any tabs it sees to four spaces and auto indent code for you as you type it. Also you will only have to hit backspace once to remove a four space indentation rather then four times.

grade/report/stats

Wednesday, June 11th, 2008

The first of two plug-ins i am making for the Animated Grade Statistics Report project is at a point where i think i can start showing it to the community and get more feed back. I am talking with Anthony Borrow about getting a tracker issue set up on the Moodle Tracker and get CVS access so i can work in/with the repo.

In till then, i have some screen shots of what the the text based plug-in for stats currently looks like:

stats_1.png

grade/report/stats is some what based on grade/report/grader (an existing standard plug-in) in terms of layout and how the data is presented but rather then students grades for each item it displays statistics for both items and aggregations (such as Course total). Each statistics, such as Highest, Lowest, etc, is a class that extends an abstract class called stats. Theses classes are then automatically loaded in and the grades witch are harvested from the database and filtered are passed to a report method in each class witch returns the result of the statistics calculations and passed along to an adapter method witch changes it all in to a nice HTML based table (using flexible_table class).

Using this method it means that a new statistic could be added to the table simply by making a new class for it with the code to process the grades and adding some language strings. So no code in the plug-in it’s self will need to be changed.

stats_2.png

There are also user options available in this plug-in witch allow the user to control what statistics are displayed, how they are calculated, what items are displayed and the format the stats are displayed in. The settings for what stats are to be displayed are automatically generated based on what stats classes are found, so a person adding a new statistic to the plug-in will not have to worry about the settings page.

stats_3.png

Like the grader report there are also toggles on the top of the report witch can be used to display less or more information and there is the functionality to filter the statistics by group. So if wanted only the statistics for one section of a course or one particular group can be displayed. You can also see in the last screen shot the issue mentioned in my last blog post here, about scales returning some interesting results for some statistics, tho if desired all scale based items can be hidden in the plug-ins options.

There are still a few things left to do for the text based report:

  • Add outcomes
  • Improve the look and readability
  • Add admin/teacher settings to override if a student can see a given statistic.
  • Add help text for the settings page
  • More settings
  • Let stats classes have the ability to set the format of the statistics they output (value, scale, letter, percent).
  • Printable version.

As some of theses are less critical i will probably start working on the visual plug-in as it is more important well getting feed back and the tracker/cvs access set up and come back to it latter on in the project.

Onward to flare!

Whats the Average of “Not satisfactory” and “Outstanding”?

Friday, June 6th, 2008

monkey_math.gif
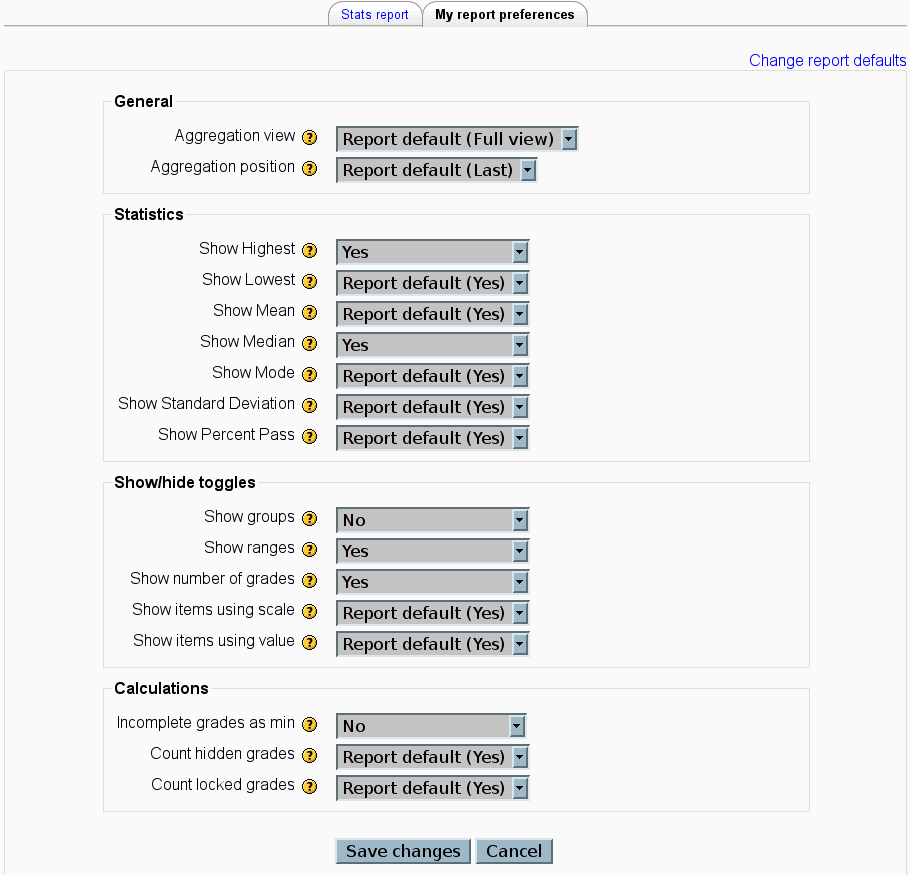
…or better yet what is the standard deviation? One of the issue i have come across well working on the stats plug-in for Moodle are grades that are not necessarily numerical values. Moodle allows for both text based grades and scales (witch are strings based on ones performance in a garble item) and it brings up the problem of how to work these grades in to common statics like mean, standard deviation, etc. For some like the mode this is simple enough to deal with and when a scale is used things like max and min grades are possible (by assigning a numerical value to each string in the scale) however something like standard deviation becomes meaningless at best (especially when expressed back in the same scale, the deviation between “Not satisfactory” and “Outstanding” is “Not satisfactory” and the average is “Satisfactory”??). What it might come down to is simply not having statistics for none number based grades or trying to find a method to express them threw a more sensible means.

Also i have made some progress on /grade/report/stats plug-in and have a demo on my test server that has the statistics per item per group as well as overall in a table. Still to do is to add options for dealing with things like hidden grades, selecting what grades users can see and cleaning up the look of the table. After that i can move on to working on the visual plug-in and the real fun can start. (I had ornignaly planed to talk about the desing of report/stats plug-in in this post but i am busy working on getting a more advanced demo up so it will have to wait and i shall have to get back to coding!)

Moodle Grade Book Plugins

Thursday, June 5th, 2008

My Internet has been down from late Friday (30th of May) night till about mid week and still is dropping a lot of packets thanks to bell, witch has made it some what difficult to look at the references for PHP and Moodle but I still have hopes to have a demo of the text based statics plug in done by this Friday or at worst this weekend.

One of the big things in Moodle is it’s modular design witch makes it rather easy to drop in new components and plug-ins with out having to change much if any of the existing code. Grade book plug-ins are no exception to this and can be dropped in to grade book by making a new directory in grade/report/ with the name of your plug-in, then a few files need to be created inside it:

/grade/report/[yourplugin]/db/access.php
<?php
$gradereport_stats_capabilities = array(
'gradereport/stats:view' => array(
'riskbitmask' => RISK_PERSONAL,
'captype' => 'read',
'contextlevel' => CONTEXT_COURSE,
'legacy' => array(
'student' => CAP_ALLOW,
'teacher' => CAP_ALLOW,
'editingteacher' => CAP_ALLOW,
'admin' => CAP_ALLOW
)
),
);
?>

This file controls the access to your plug-in and the risk of giving roles access to it. I believe these settings are turned into new rows in the capabilities part of the database.

/grade/report/[yourplugin]/lang/en_utf8/gradereport_[yourplugin].php
<?php
$string['modulename'] = '[yourplugin'sname]';
$string['[yourplugin]:view'] = 'View [nameofyourpluginsreport] report';
?>

This is the langue file where all the strings should go so they can be easly transalted if need be. ‘modulename’ and ‘[yourplugin]:view’ and used threw out Moodle and should be set as a minimum.

/grade/report/[yourplugin]/version.php
<?php
$plugin->version = 2008060500;
$plugin->requires = 2008060500;
?>

This is the version file for the plug-in and should use the current date.

/grade/report/[yourplugin]/index.php
This is the file that will be ran/viewed when the user views the report. Links to it will be automatically generated if you set everything up correctly.

/grade/report/[yourplugin]/lib.php
It is recommend that you use this file to make a class witch extends the grade_report class to get access to use full methods and variables to make your report plug-in however it is not necessary to do so and a plug-in could be developed with out this file.

For my text based statistics plug-in i have made an harvest, report and adapter methods in side a class witch extends grade_report. Then to keep with the modular design, i have made an abstract class called stats witch can be extended to add in new statistics with out modifying other parts of the plug-ins code. Currently i have highest, lowest, median, mode, mean and standard deviation sub classes but a new statistics could be added by simply making a new class that extends stats and has a report method to calculate it (more about the design in my next blog post).

For more information about grade book plugi-in’s in Moodle see the tutorial here.